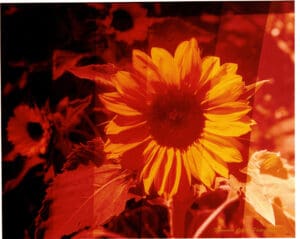
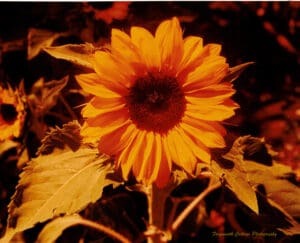
My next step in learning colour printing was to try a negative that was going to be a bit more difficult to get the correct colouring. Partly because the subject is predominantly one colour, and partly because of the film. I chose a photograph of a sunflower, taken on 35mm Flic Film Elektra. This film is respooled from Kodak Aerocolor IV, originally designed for aerial photography. The film is described by Kodak as not having “integral color masking, direct interpretation can be made from the negative. Objects are recorded in colors complementary to their natural colors. This film incorporates an integral ultraviolet-absorbing filter, so color correction filters are not normally used.” The base of this film is clear, so it doesn’t have the brown/orange mask of a regular colour negative. This means the colours are not as “true” as another type of colour film, presumably because aerial photography doesn’t require the same colour reproduction as fashion photography, for example. If you want to get into the techinical aspects you can read this article. But at the same time, modern RA4 papers are no longer optimised for optical (darkroom) printing, so “correct/true” colour filtering isn’t always possible anyway. The same paper is used for digitial printing, and that’s where the focus of the paper manufacturers is now. See this article for more information.
So for this second print, I’m again using the Crystal Archive Glossy, Medium Contrast, Resin Coated paper. For my exposure test I decided to forego the Comask and make a test strip in the same way as I would a B&W print, by sliding a piece of card over the print at roughly even intervals. For this test I used f8, —, 6 x 2 seconds. 4 seconds seemed the best option.
I went back to the Comask for the filter test and ended up making four tests as I forgot to recalculate the exposure time and totally mucked up my first one and then the two that followed. The third test was f8 and:
- – 50 20, 7s
- -70 20, 8s
- – 50 30, 8s
- – 50 40, 8s
I then did a full print at f8, – 70 20, 8s (second test) just to get a better look at the colours.
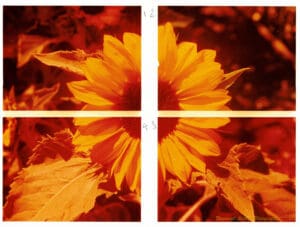
This was where my note taking was useful. I looked back over the tests, figured out my mistake with the exposure time and started again. The fourth filter test was much better, f8 and:
- – 50 -, 6s
- 50 50 -, 11s
- 50 – -, 5s
- 30 60 -, 11s
This was getting closer, but I decided to call it a day and look at it again with fresh eyes in another session.
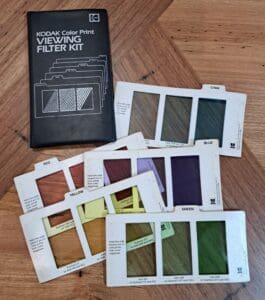
Before my next print session I was able to pick up a Kodak Viewing kit. This kit allows you to hold a filter colour (with three density options) over the print and find the best colour match. The filter which achieves this colour will then tell you how much to add or subtract from one or two of the filter settings. My kit is missing the Magenta card, but with the five other cards I can still get an estimate of what adjustment I need to make.
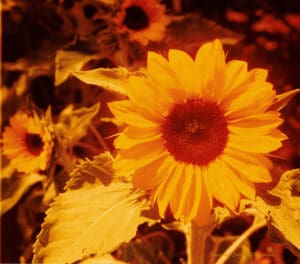
Using the exposure test from the previous session, I decided to do another full print using f8, 30 60 -, 11s.
Looking at it through the Kodak Viewing Kit I found the green filter to be the best match and added 20M. The next full print was done at f8, 30 80 -, 12s, and I was much happier with it. I redid this print several times to get a final print as my prints were coming out with either dust on them or crooked borders. I have no idea how, but the paper, once lined up in the easel is somehow shifting before exposure. This print took me 12 hours to produce, I’m definitely still in the learning phase.
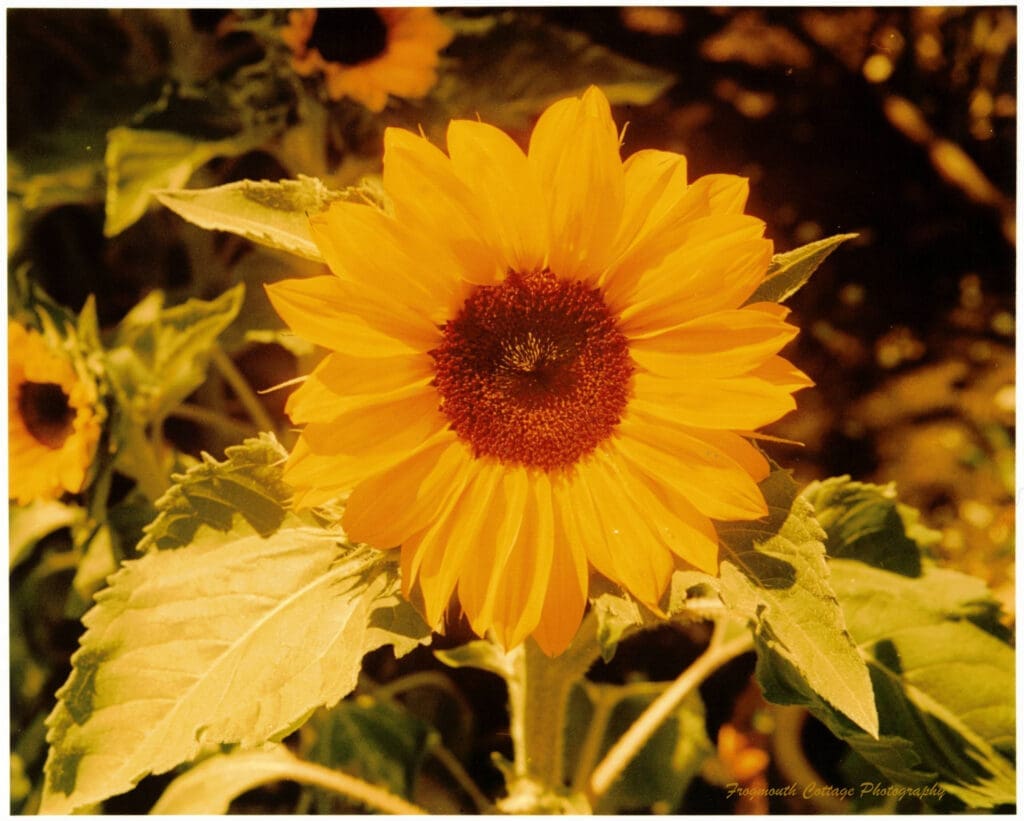
As far as the colours go, the sunflower has a much deeper/orange yellow than the one I photographed, however the green of the leaves and the brown of the dirt seem pretty right. I’m really happy with the outcome, which is good, because I have a lot more sunflower photos.
It’s now time to give my enlarger and laundry darkroom a good clean as the dust is doing my head in!